
Activate Your License and Configure the First Tenant
For the complete documentation index, see llms.txt. For a full content snapshot, see llms-full.txt. Append.mdto anykestra.io/docs/*URL for plain Markdown.
When you launch Kestra Enterprise Edition for the first time, Kestra walks you through configuring your instance: setting up your first tenant, creating your first user, and starting the Kestra UI.
Prerequisites
Kestra Enterprise Edition requires a valid license under kestra.ee.license. Contact sales@kestra.io to obtain one.
The license is set up using three configuration properties: id, fingerprint, and key.
kestra.ee.license.id: license identifier.kestra.ee.license.fingerprint: license authentication. This is required to use Versioned Plugins.kestra.ee.license.key: license key.
kestra: ee: license: id: <LICENSE ID> fingerprint: <LICENSE FINGERPRINT> key: | <LICENSE KEY>When you launch Kestra Enterprise Edition, it will check the license and display the validation step in the log.
Step 1: Validate configuration
The first screen shows the main configuration of your instance. It displays:
- whether
multitenancyis enabled - whether
default tenantis enabled — if yes, you can skip Step 2 allowing you to create your first tenant - which
databasebackend is configured (e.g., PostgreSQL or Elasticsearch) - which
queuebackend is configured (e.g., PostgreSQL or Kafka) - which
internal storagebackend is configured (e.g., S3, GCS, Azure Blob Storage, MinIO, or local storage) - which
secretbackend is configured (e.g., Vault, AWS Secrets Manager, Elasticsearch, or not set up yet)
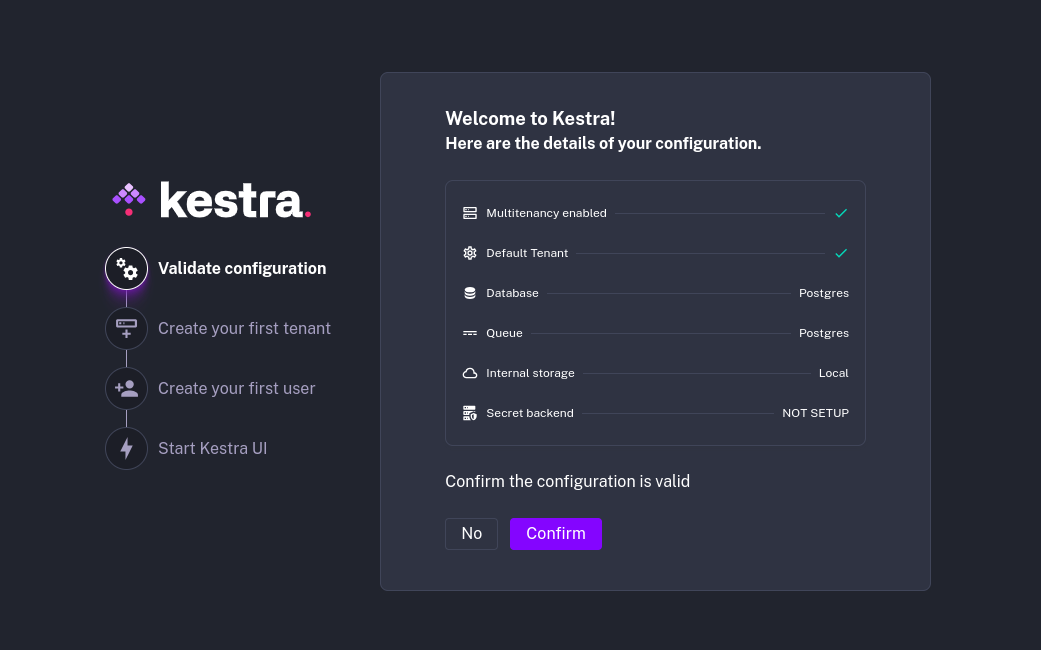
This step asks you to confirm whether your configuration is valid. If not, you can correct the configuration, restart the instance, and start the setup from scratch.
Step 2: Create your first tenant
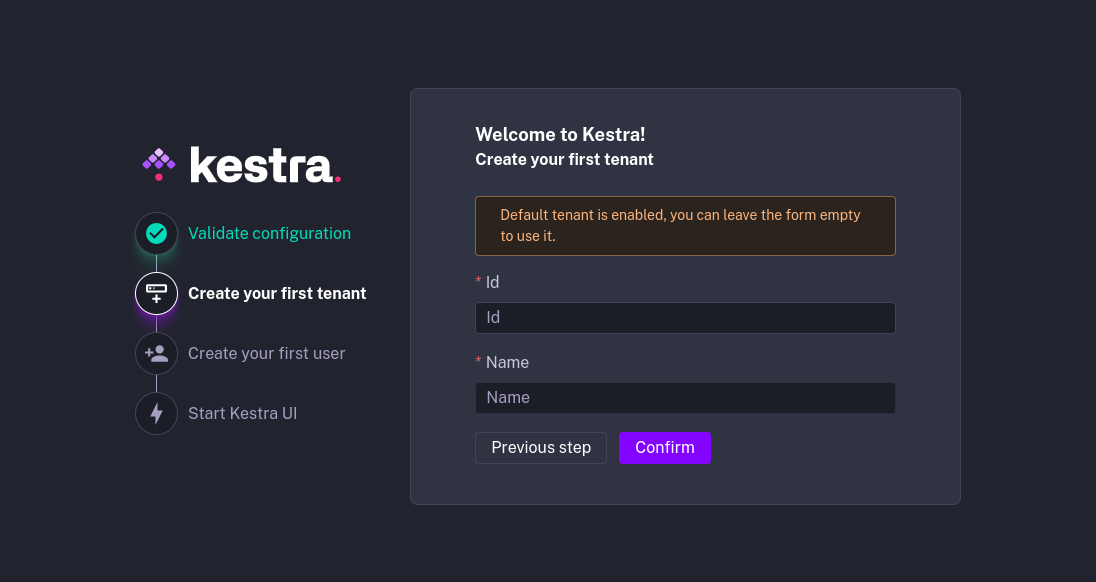
If multitenancy is enabled, Kestra will prompt you to create your first tenant. Enter a Tenant ID and Tenant Name, for example:
- tenant id:
stage - tenant name:
Staging Environment
If you enabled a default tenant, you can skip this step.
Step 3: Create your first user
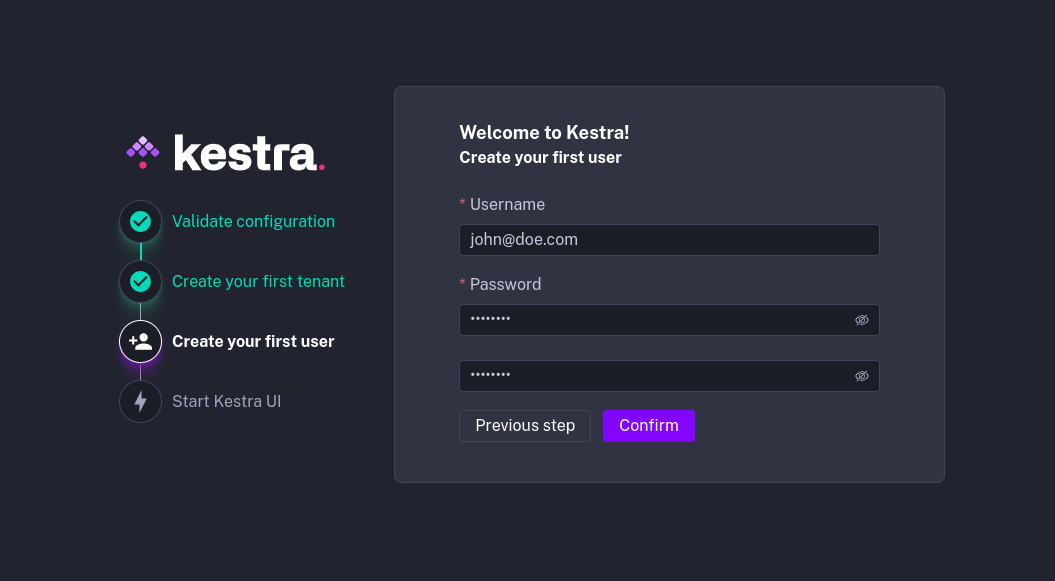
Create the first user. This user receives the Instance Owner privilege and can manage tenants, users, and roles across the instance.
Step 4: Start Kestra UI
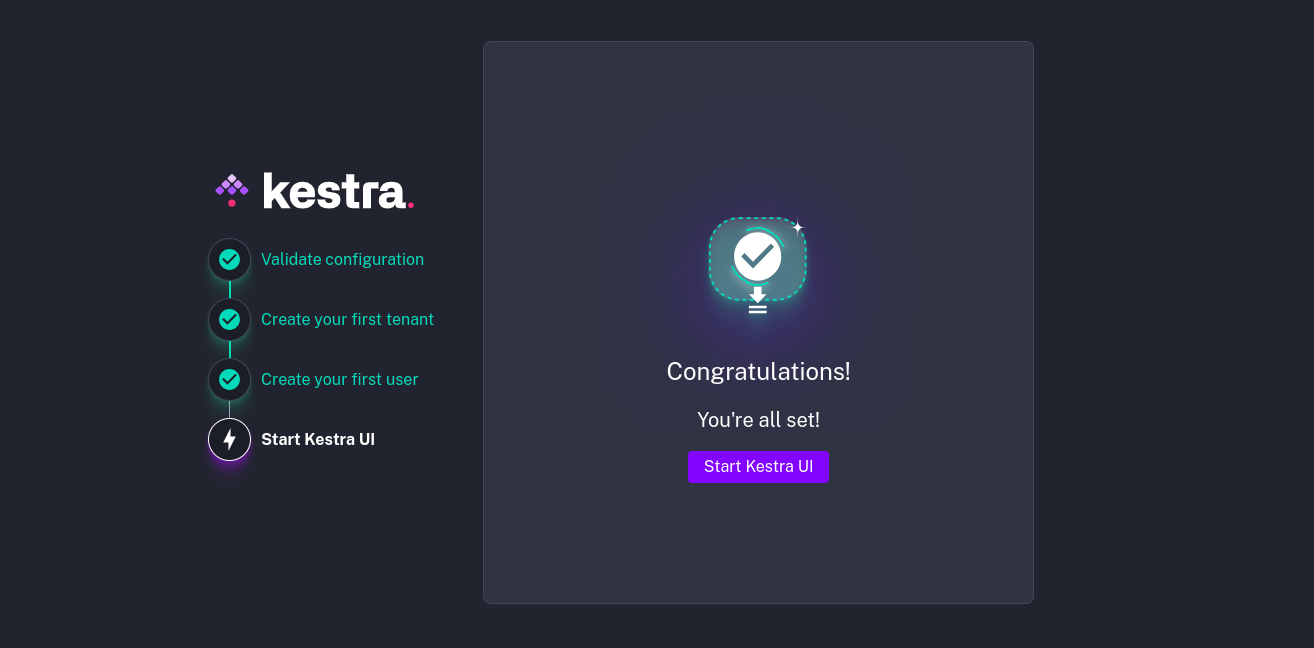
Once your tenant and user are configured, Kestra will launch the UI and log you into your new tenant as the first user.
Was this page helpful?