
Manage and Edit Flows from the Kestra UI
For the complete documentation index, see llms.txt. For a full content snapshot, see llms-full.txt. Append.mdto anykestra.io/docs/*URL for plain Markdown.
Manage your flows in one place.
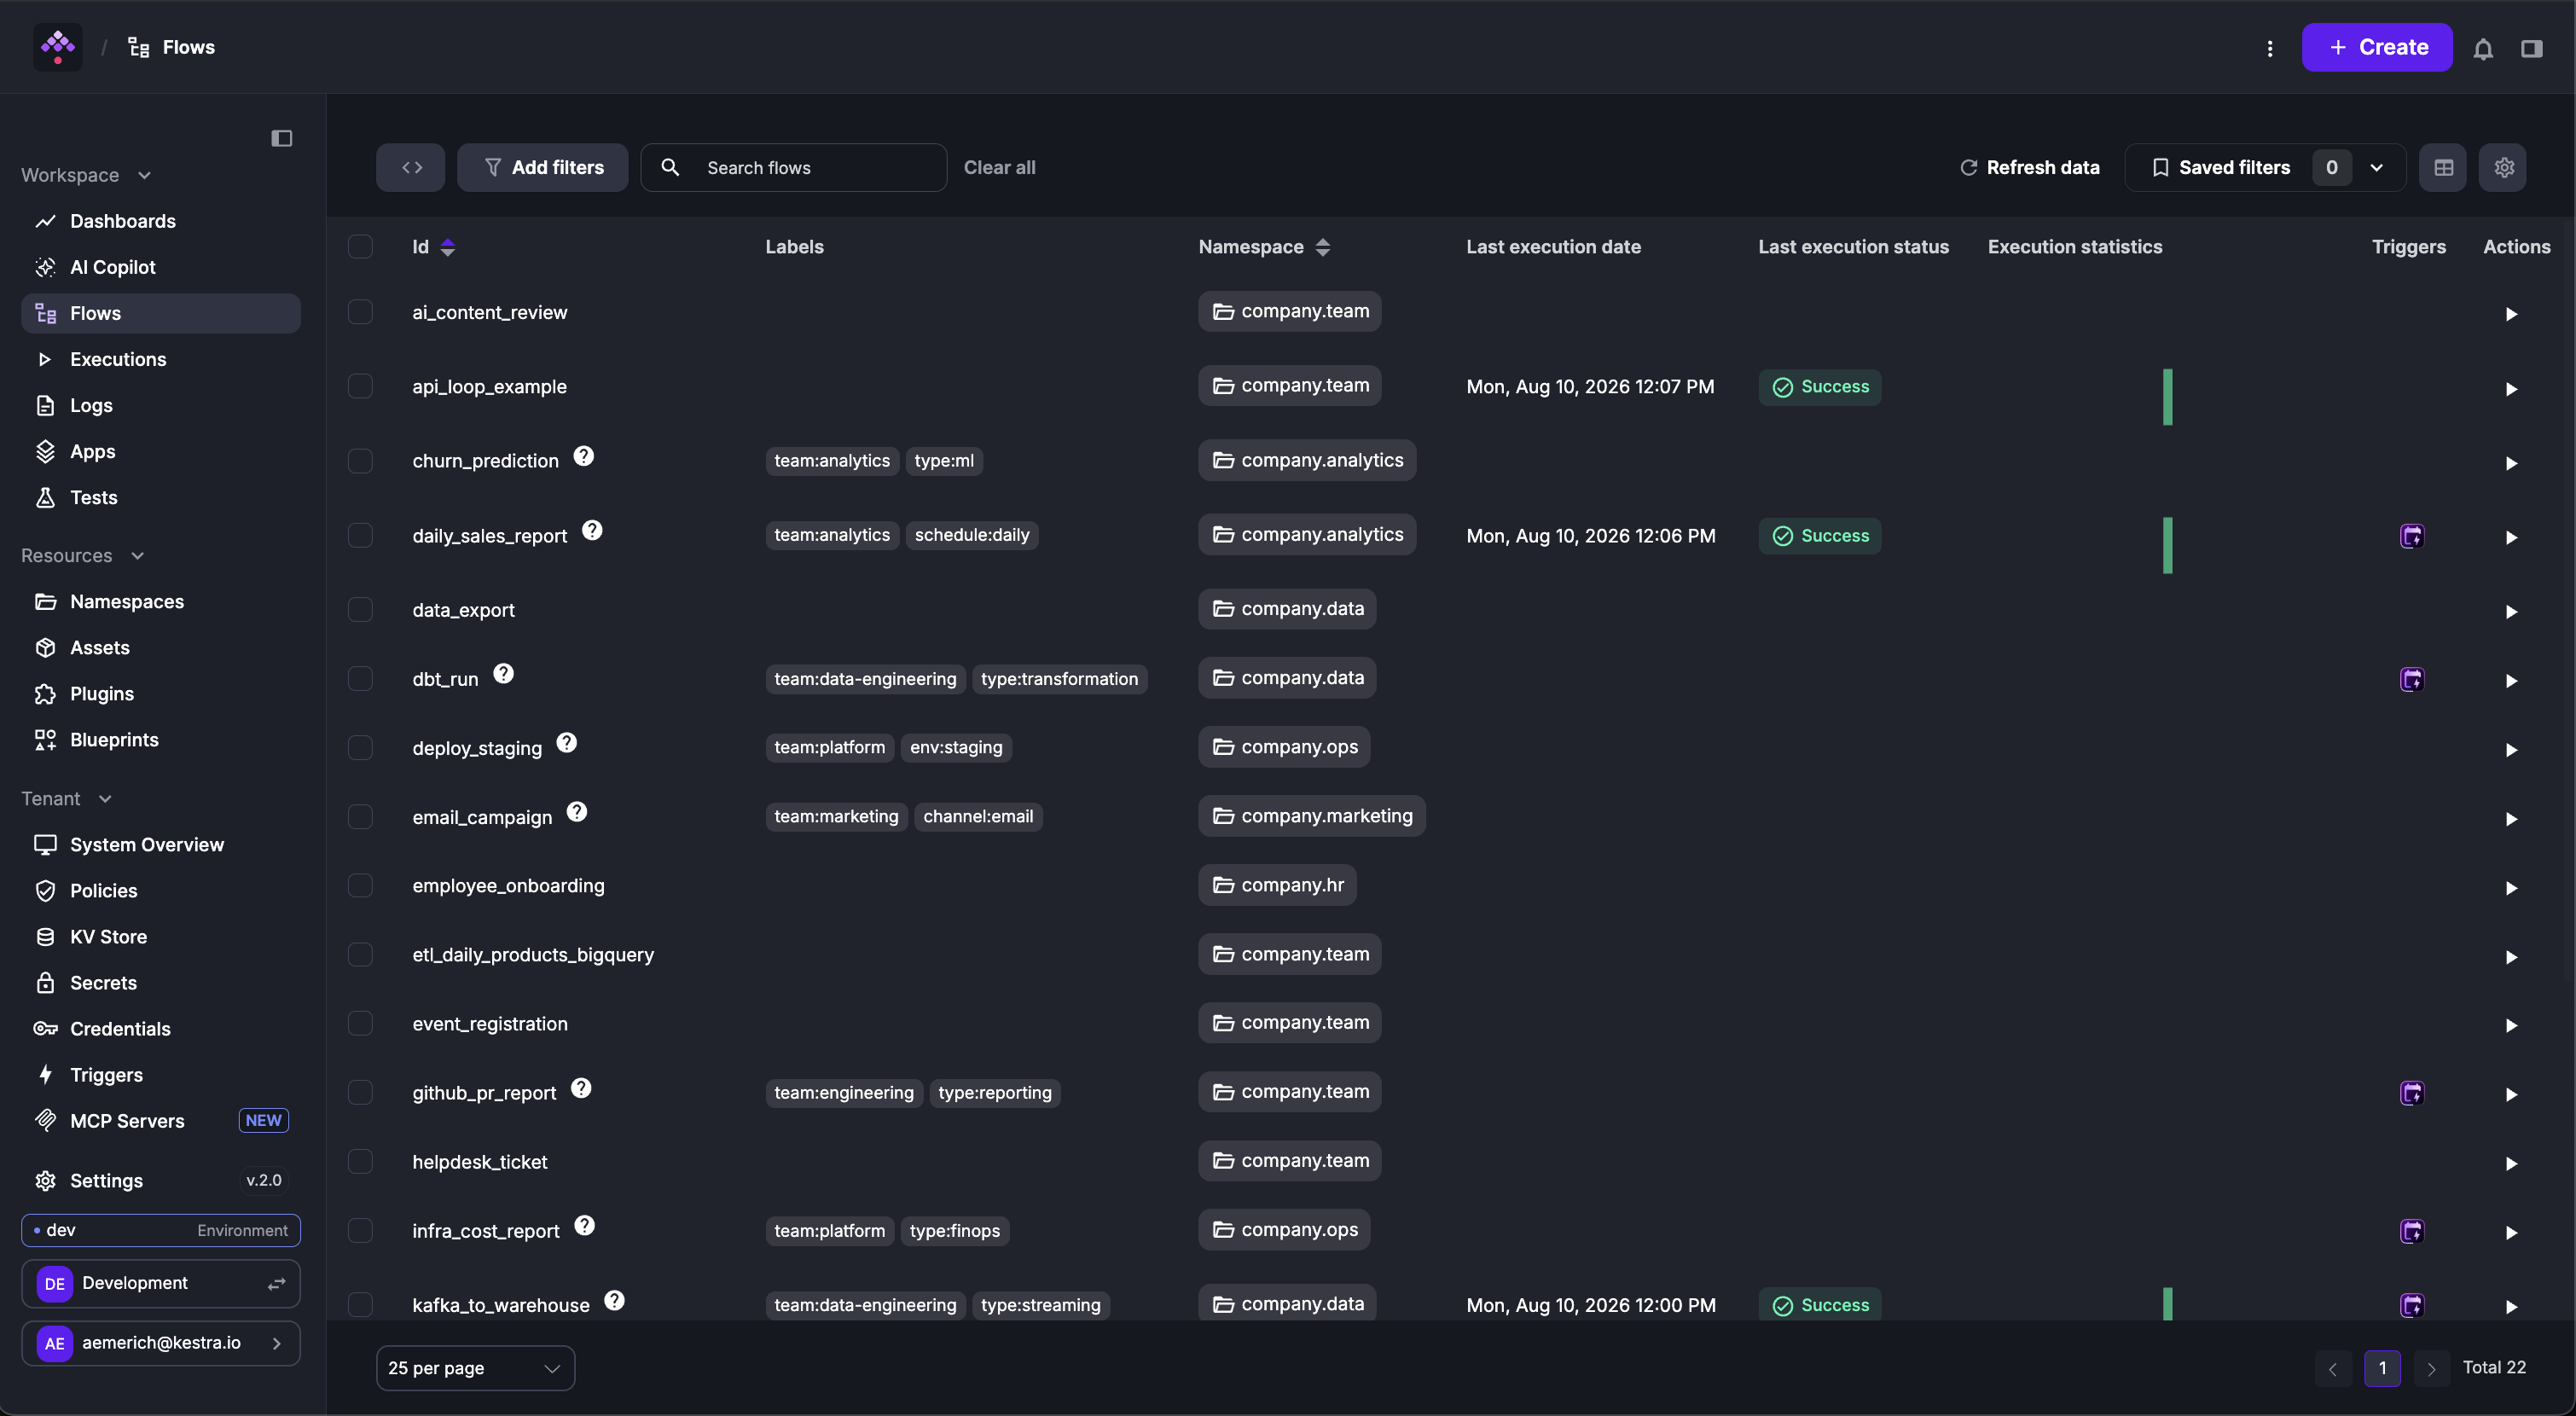
The Flows page lists all flows. Click a flow ID to open it, or create a new flow from the top-right corner.
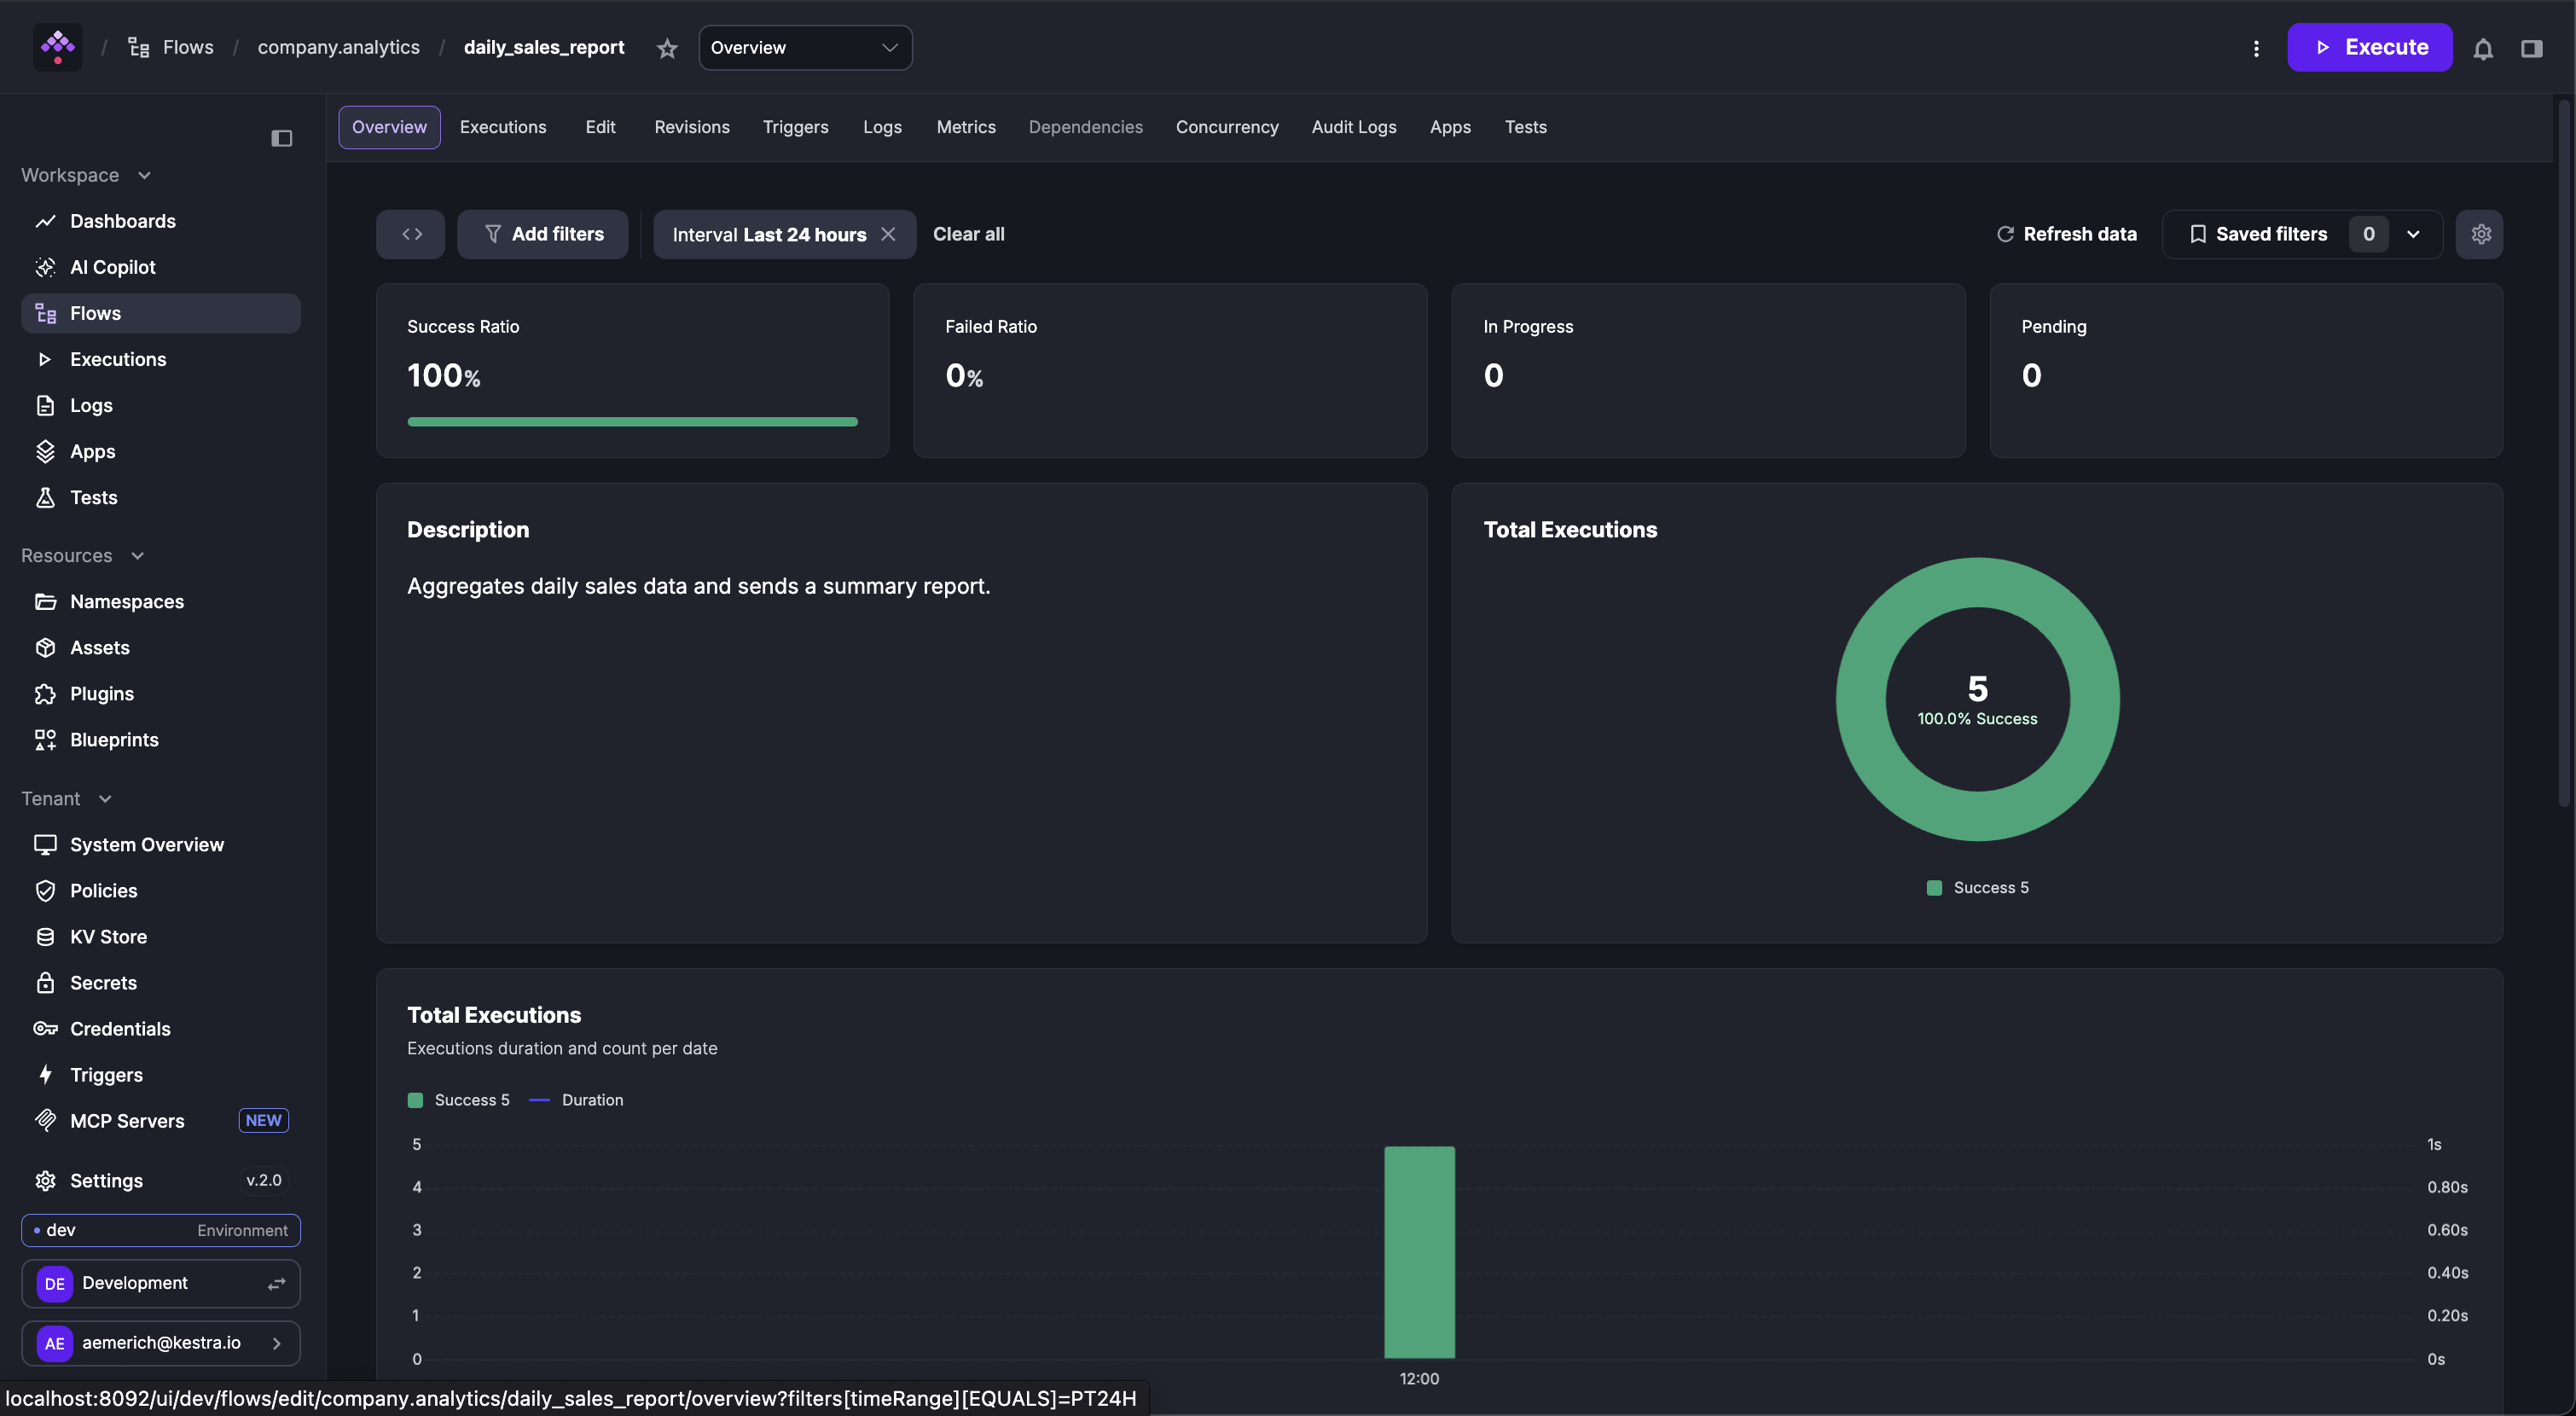
A Flow page has tabs for Overview, Executions, Edit, Revisions, Triggers, Logs, Metrics, Dependencies, and more.
Filters
From the main Flows page, you can filter the displayed flows on fields like namespace, scope, labels, and open text. The filters are key based with comma-separated OR-conditions and spaced-separated AND-conditions. The following video demonstrates the filters in action:
Edit
The Edit tab is the main authoring environment. Open panels from the tab bar and arrange them side by side:
- Flow Code — YAML editor with autocomplete
- No-code — visual flow builder with task cards and a structured outline
- Topology — visual DAG of the flow
- Docs — plugin documentation, updates as you move the cursor
- Files — namespace files editor
- Blueprints — ready-to-use flow examples
- Context — namespace variables, KV pairs, and secrets (Enterprise)
From the top-right of the editor, you can access Revisions, Dependencies, and any validation Errors. Use Export flow to download the flow as a YAML file.
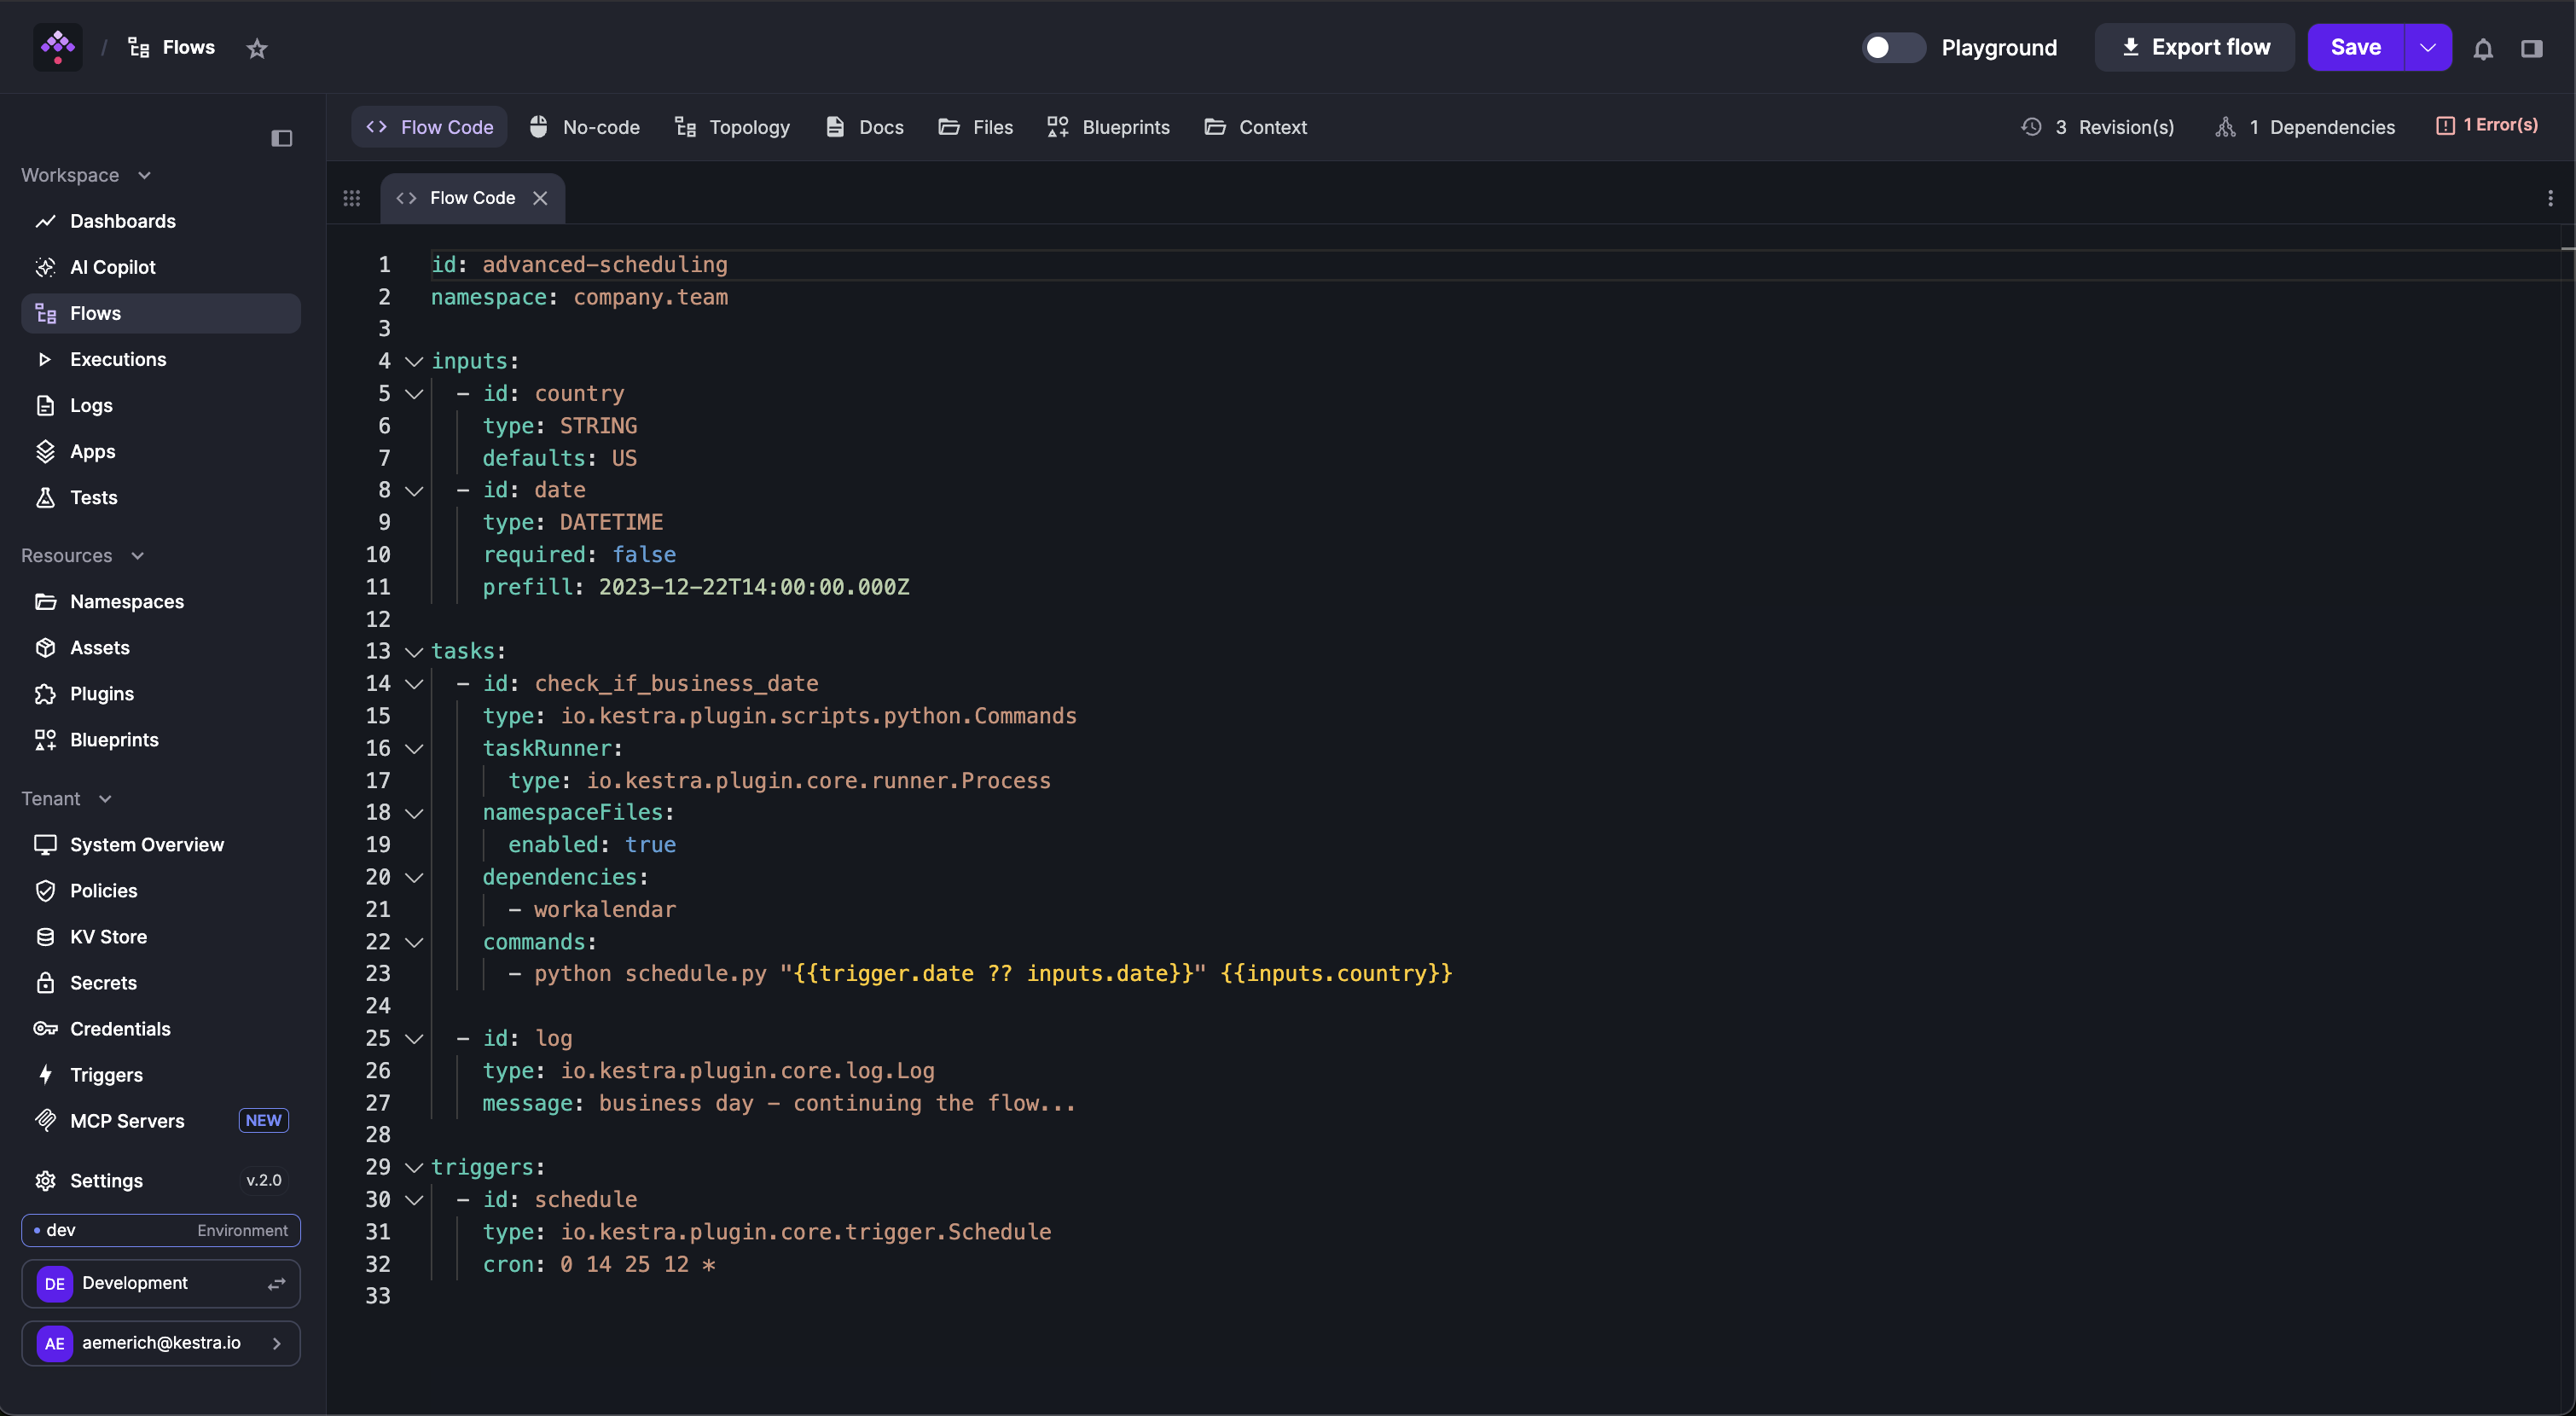
Flow Code view
The Flow Code view is a YAML editor with autocomplete. Tasks added here appear immediately in the No-code and Topology views.
No Code view
The No Code view is a canvas-based flow editor. The canvas displays each flow section — Triggers, Tasks, Errors, Finally, and After Execution — as a group of visual blocks. Selecting a block opens its configuration form in a third panel alongside the canvas.
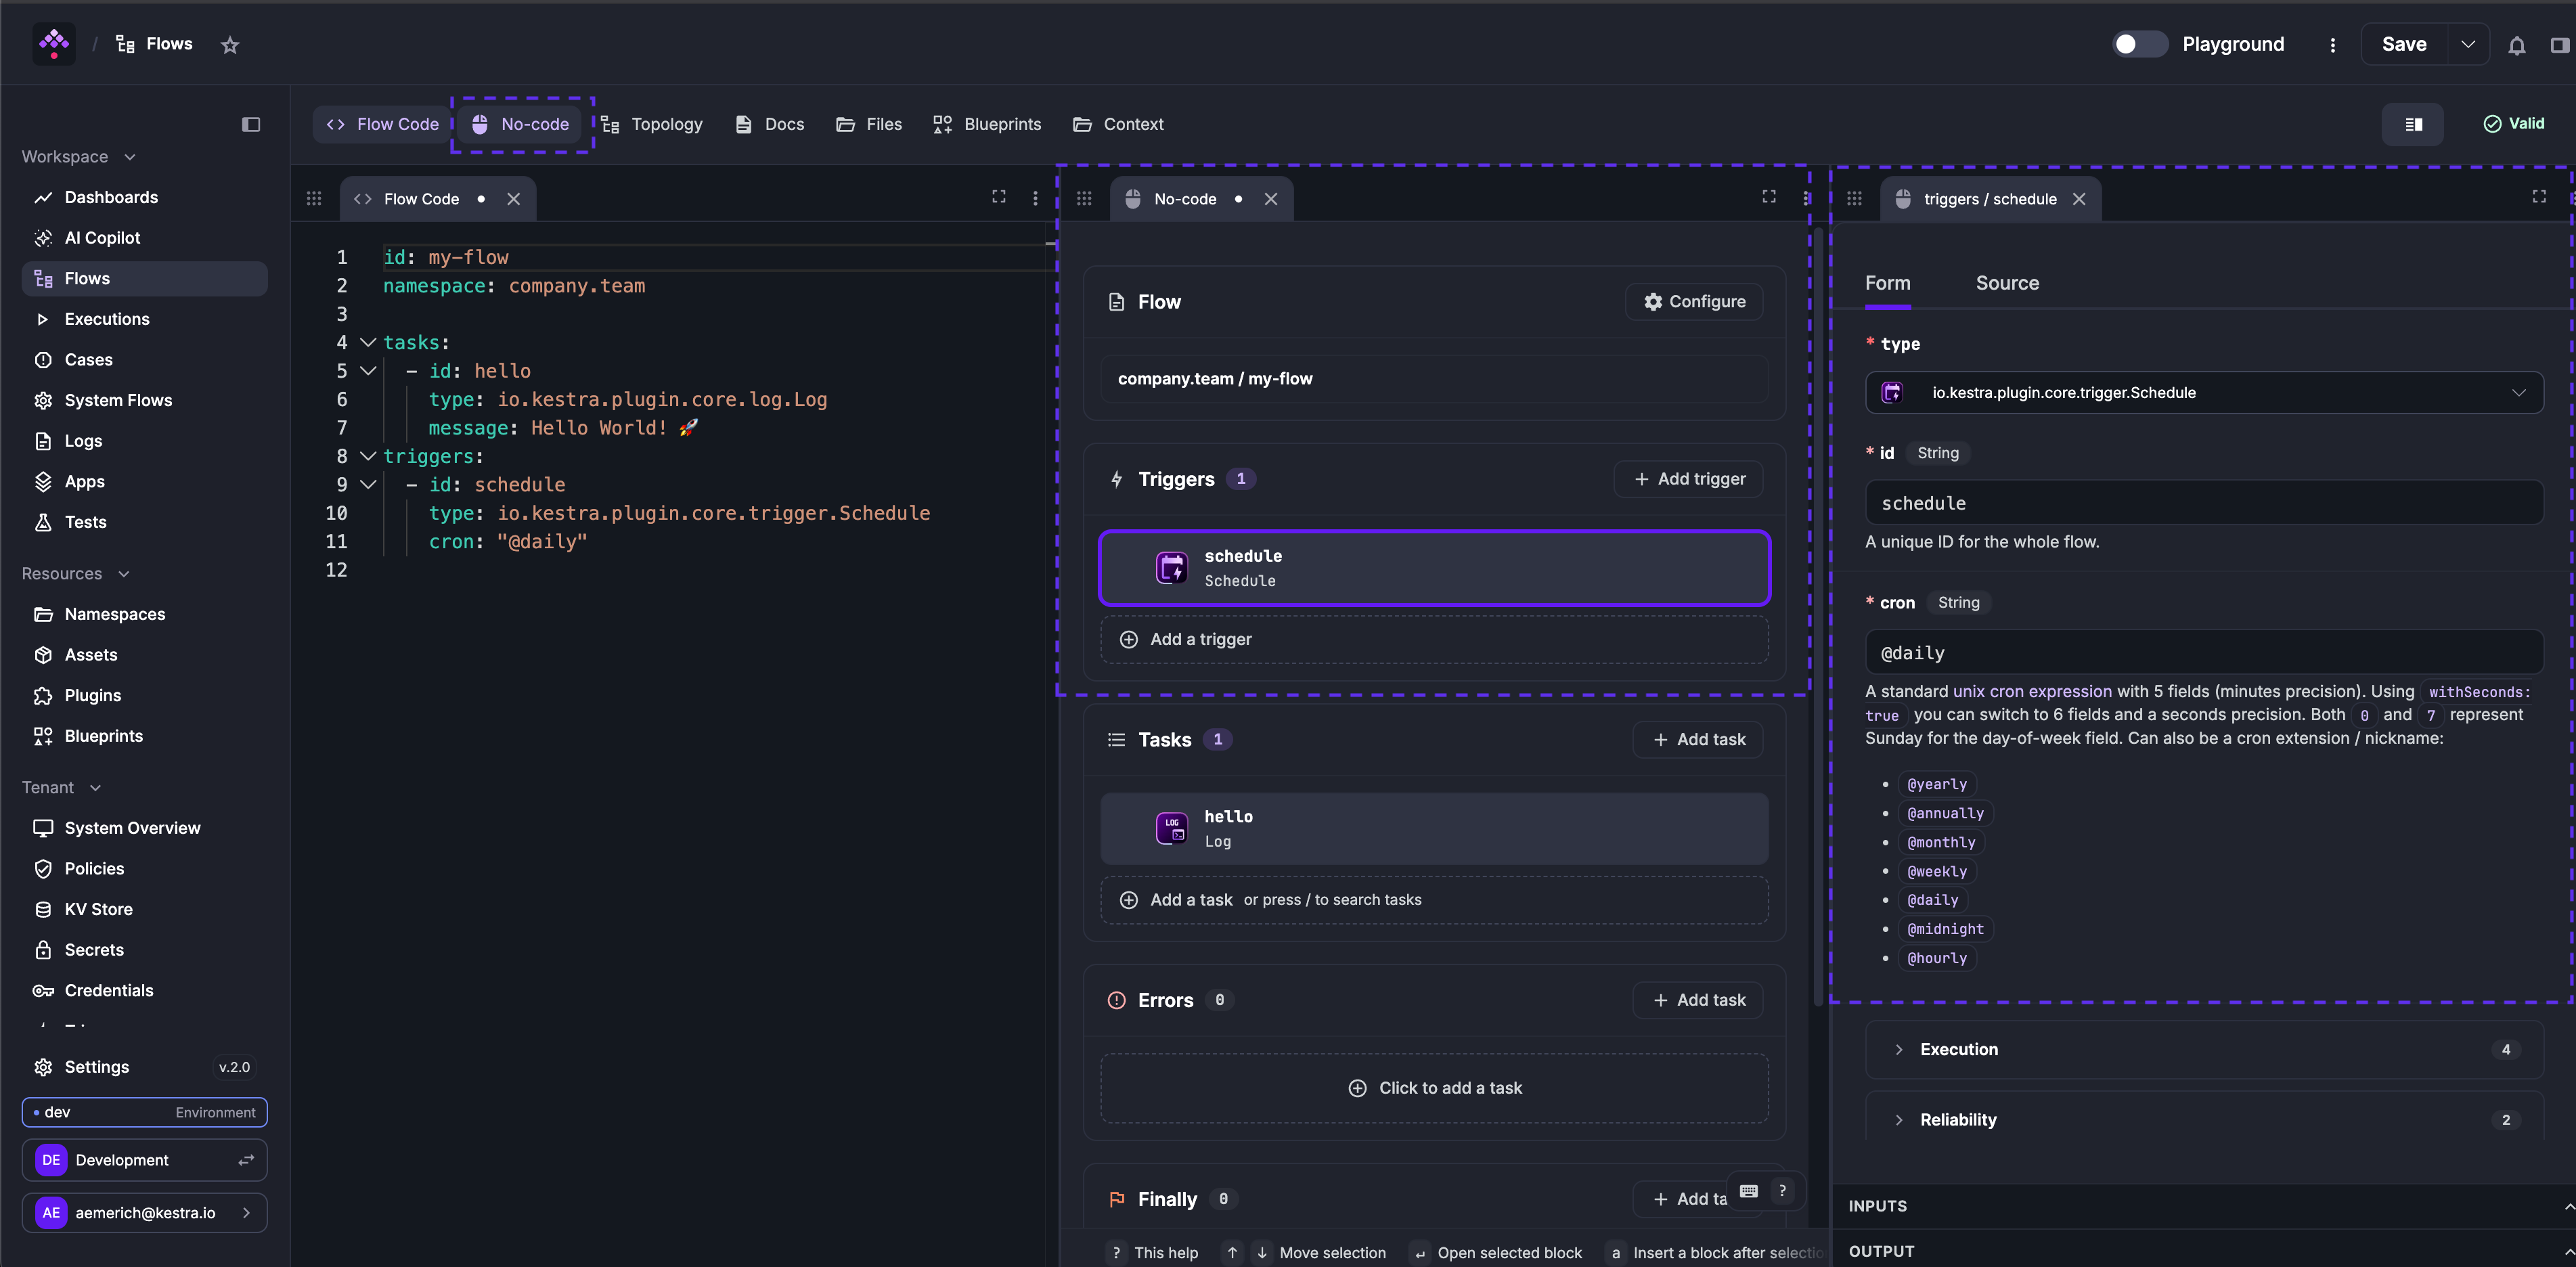
Click any block to open its form. The form has two tabs: Form (guided fields with inline documentation) and Source (raw YAML for that block). You can switch to Source to write or paste YAML directly — the flow YAML editor on the left stays in sync instantly.
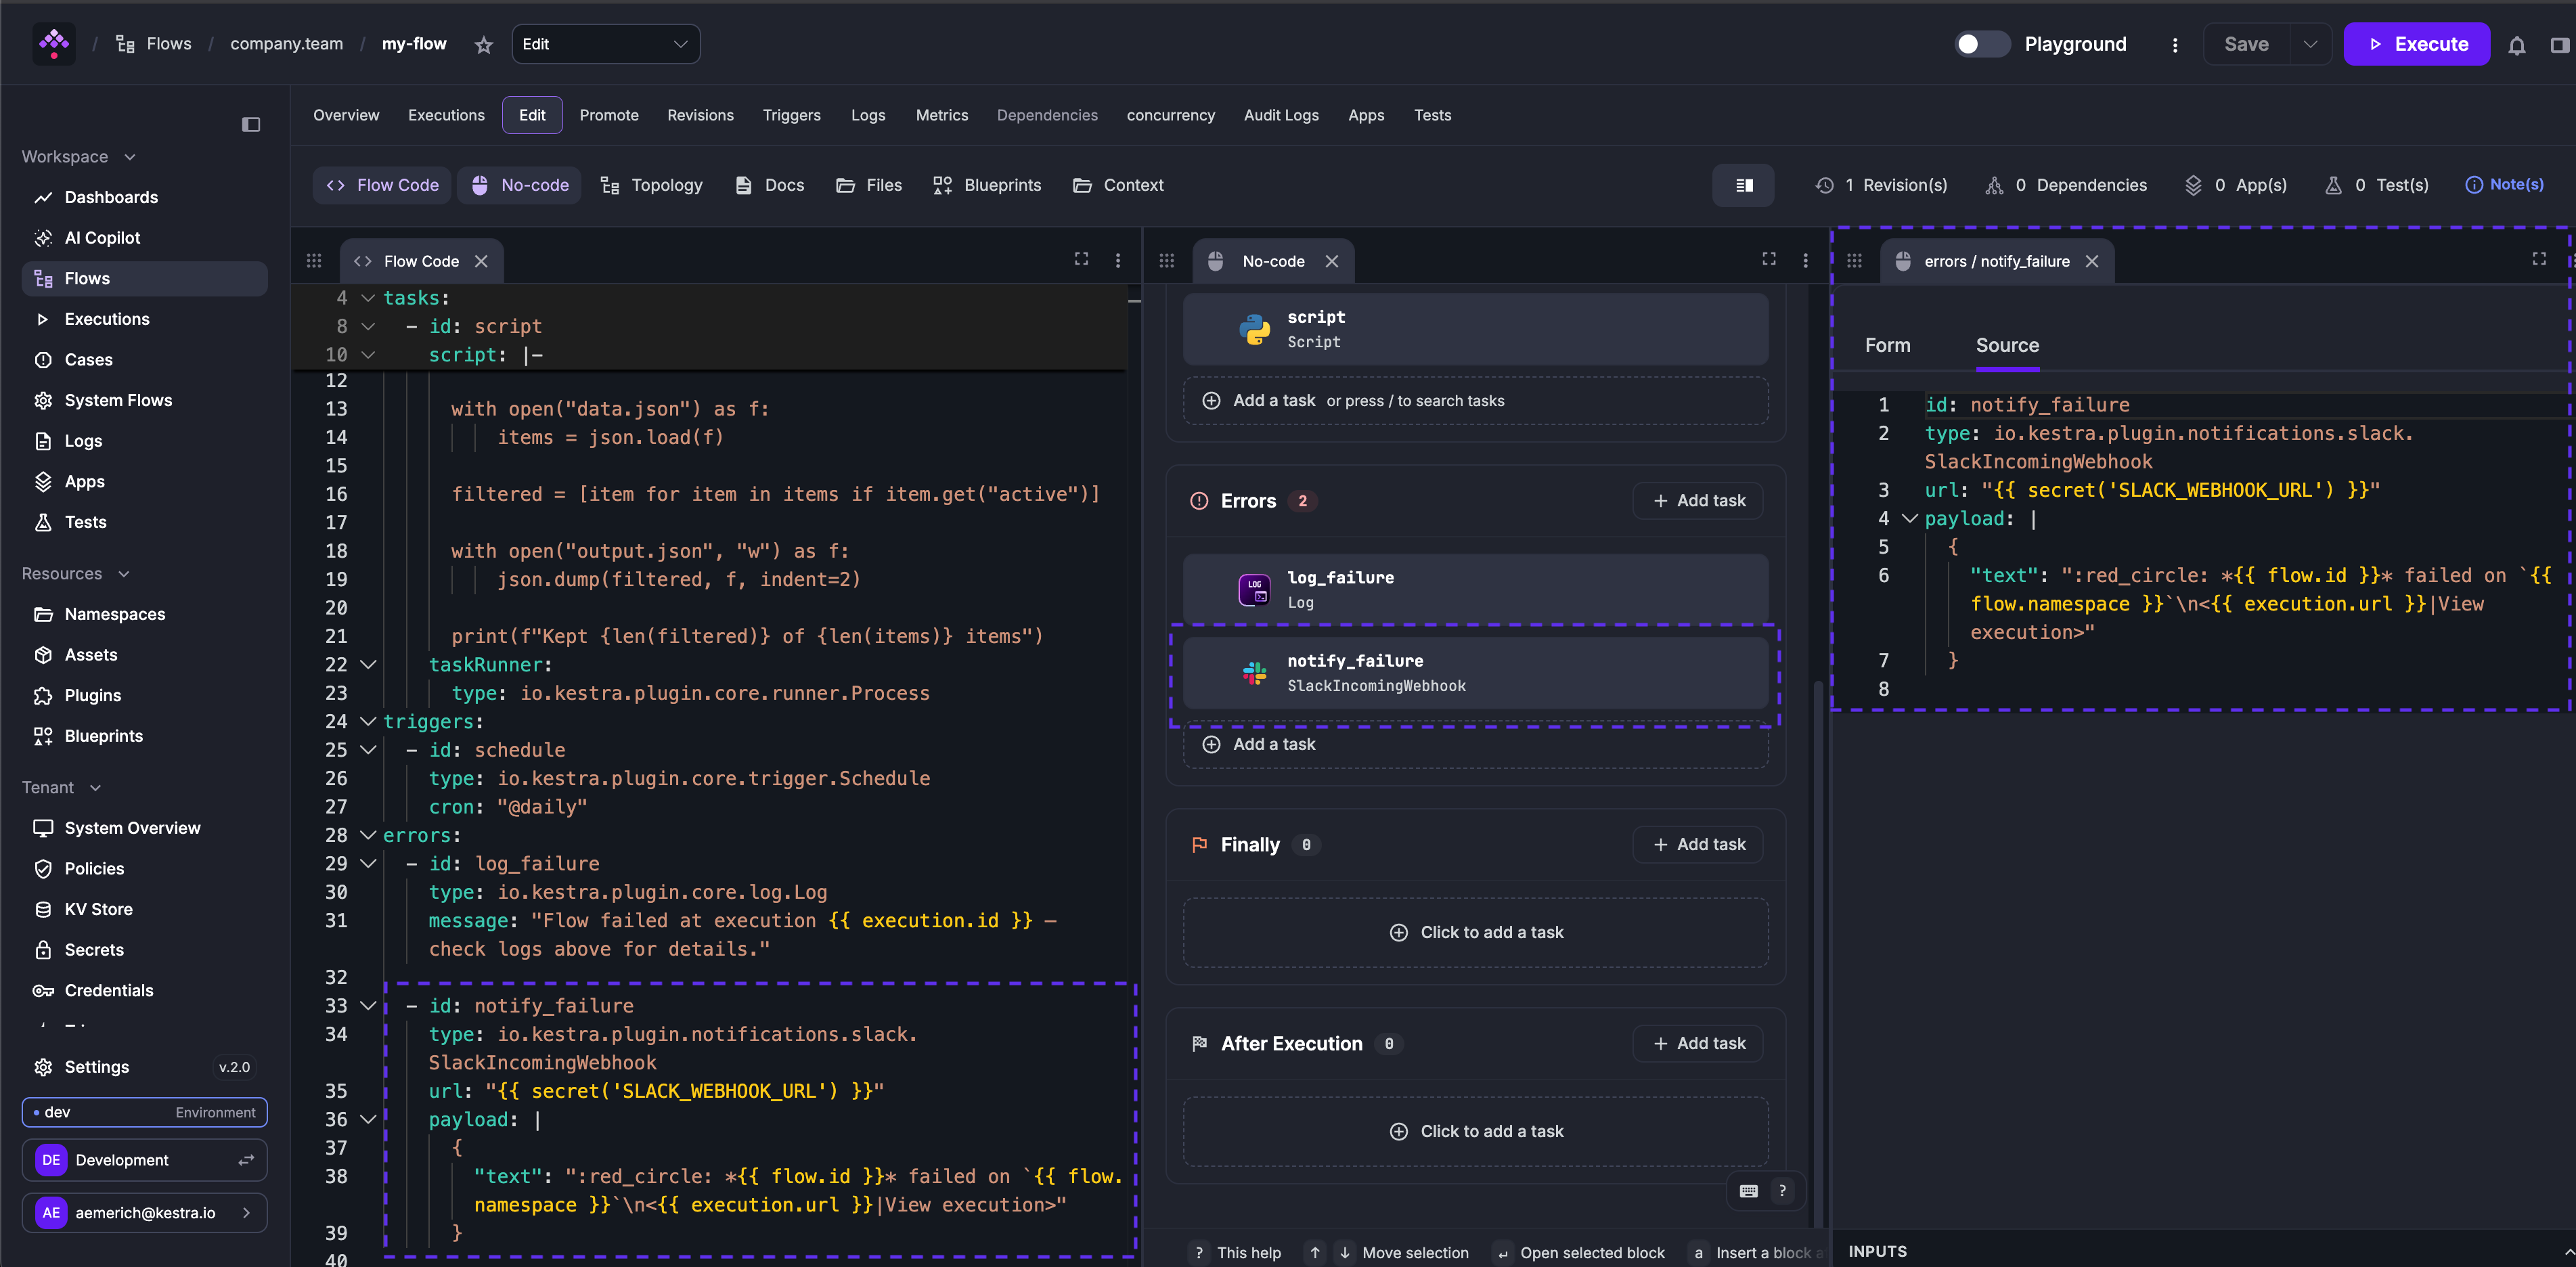
To add a block, click + Add task or + Add trigger in the relevant section, or press / anywhere on the canvas to search and insert a block at the cursor position. Use the keyboard shortcuts shown in the bottom bar to navigate (↑ ↓), open a selected block (⇧), or insert after the current selection.
Click Configure at the top of the canvas to edit flow-level properties (namespace, description, inputs, outputs, variables, and more).
Focused view
Opening a block expands it into a focused modal by default. The modal has two panels:
- Left — Inputs: lists every value you can reference in this task’s properties. Upstream Outputs shows the output keys of all tasks that run before this one; Execution Context lists all built-in variables available at runtime (
flow.id,execution.id,taskrun.id,trigger.date, and so on). Use these as a reference when writing Pebble expressions in the form fields. - Right — Form / Source: the task configuration form. Switch to Source to edit raw YAML for the block. An Output panel on the right edge shows the task’s output schema.
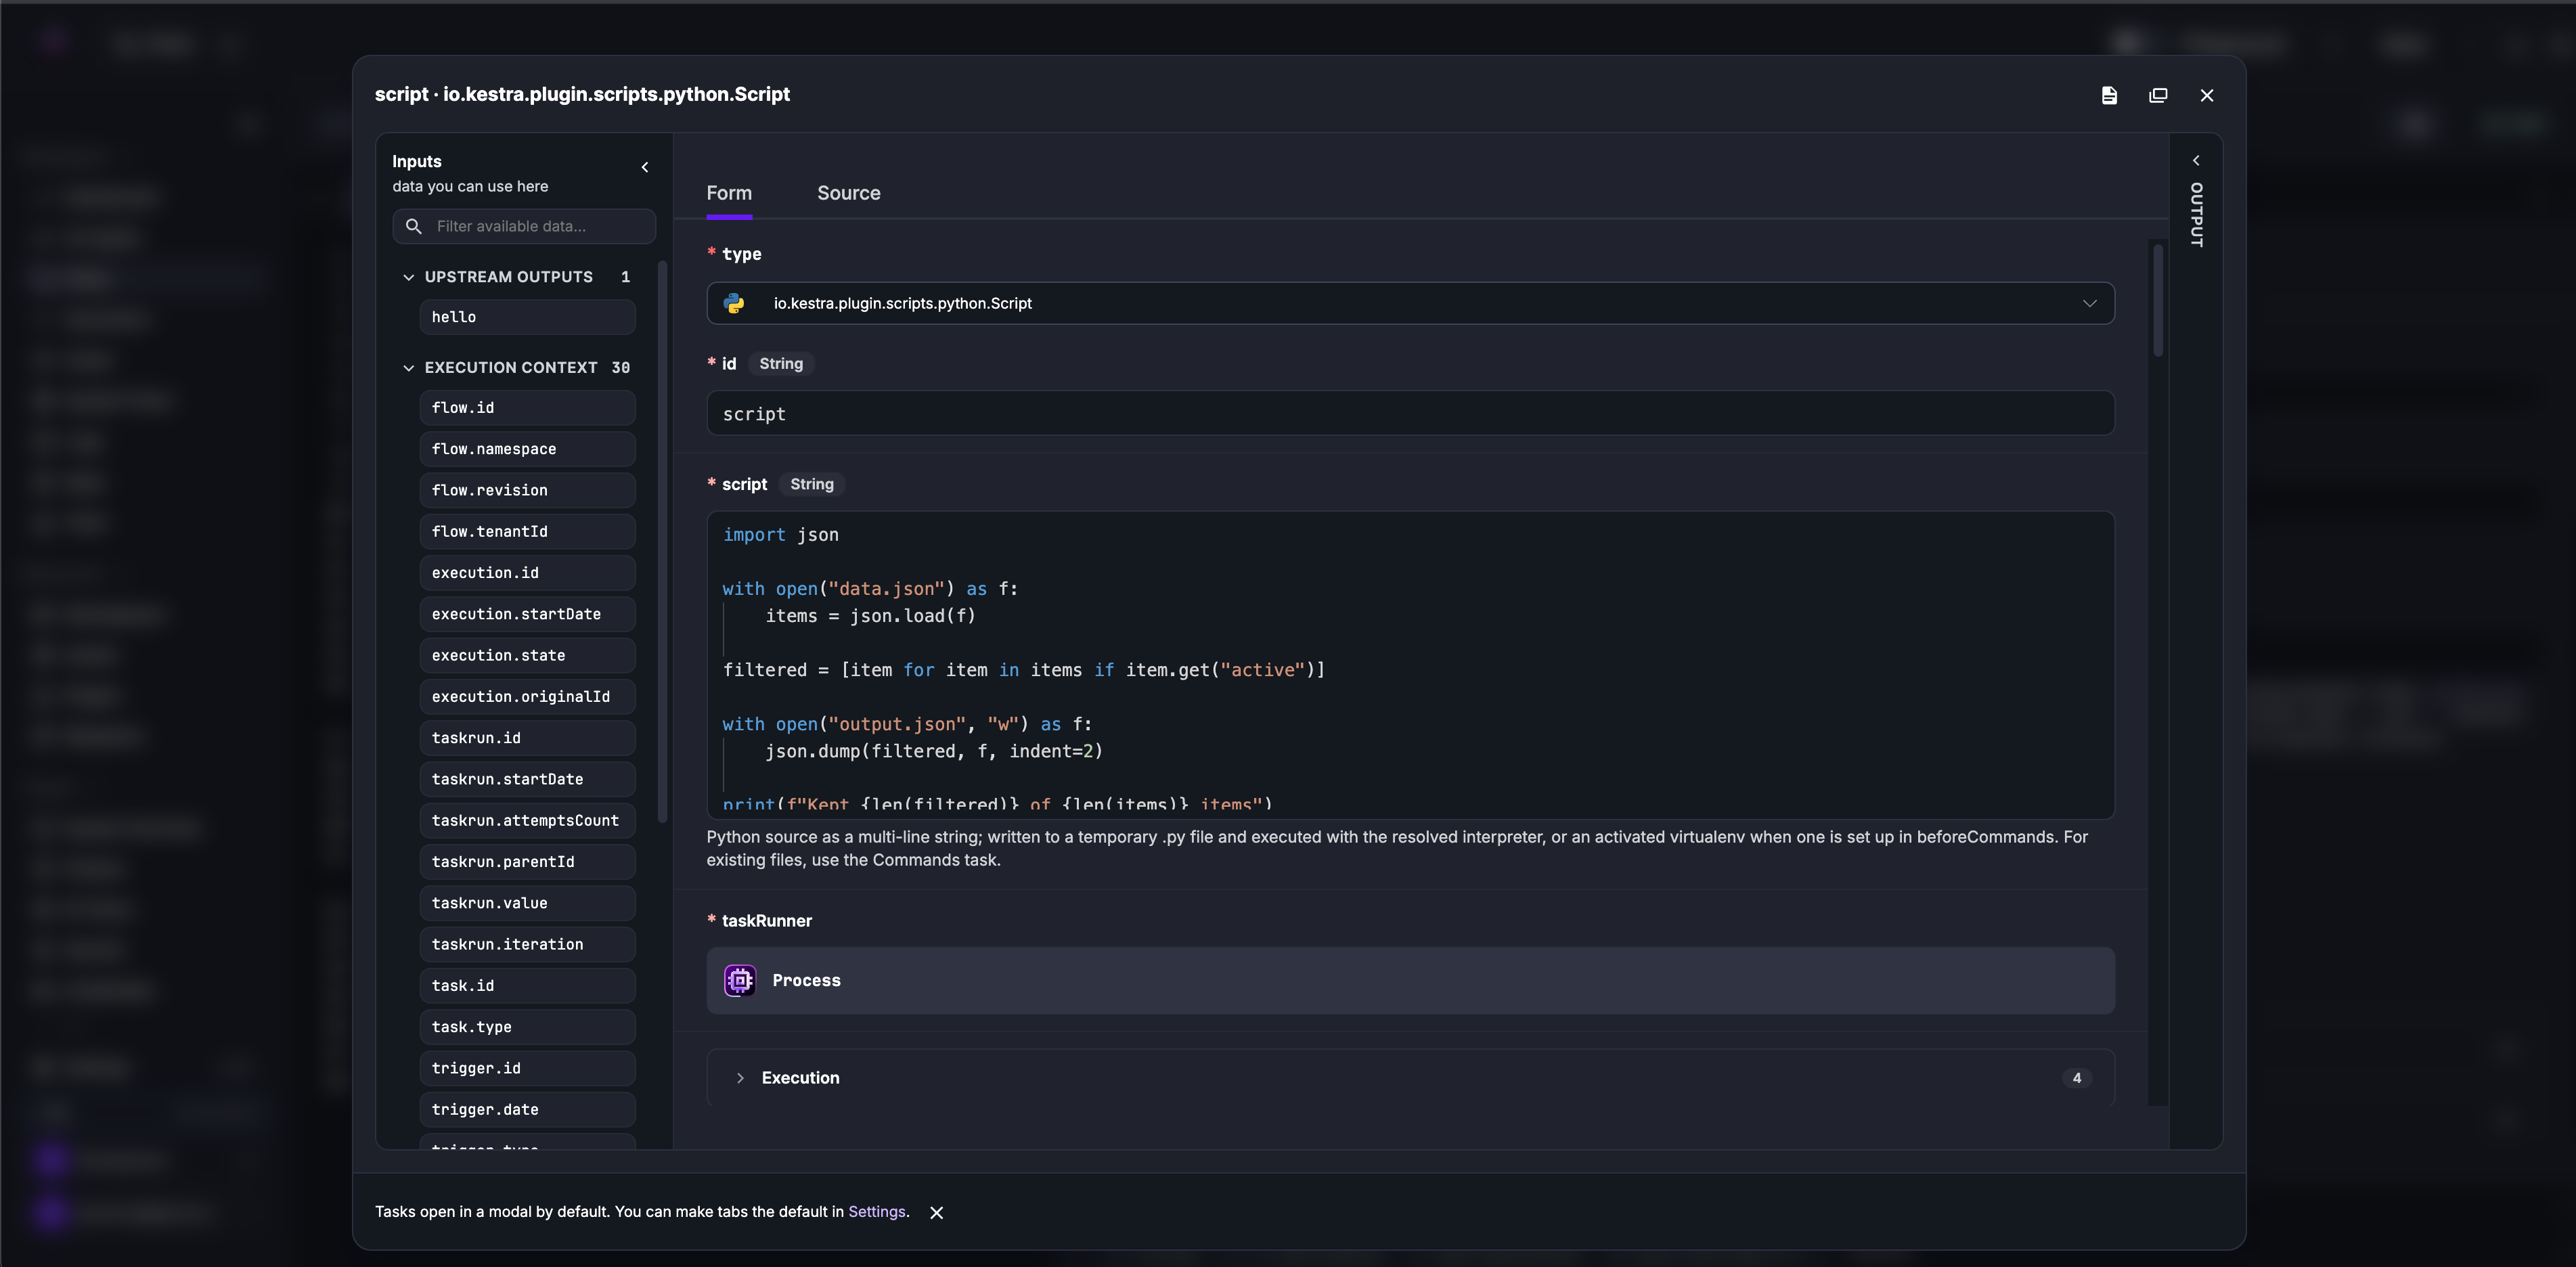
Tasks open as a modal by default. To open blocks as tabs in the editor instead, change the default in Settings.
You can open multiple panels simultaneously — for example, keep Docs open alongside the canvas to reference plugin documentation while configuring a task. Use the Actions menu to export or copy the flow at any time.
Flow Code, No-code, and AI Copilot all stay in sync. Start in any mode — write YAML, describe your flow to the Copilot, or build visually on the canvas — and switch freely at any point. Every change is reflected across all three views instantly.
Topology view
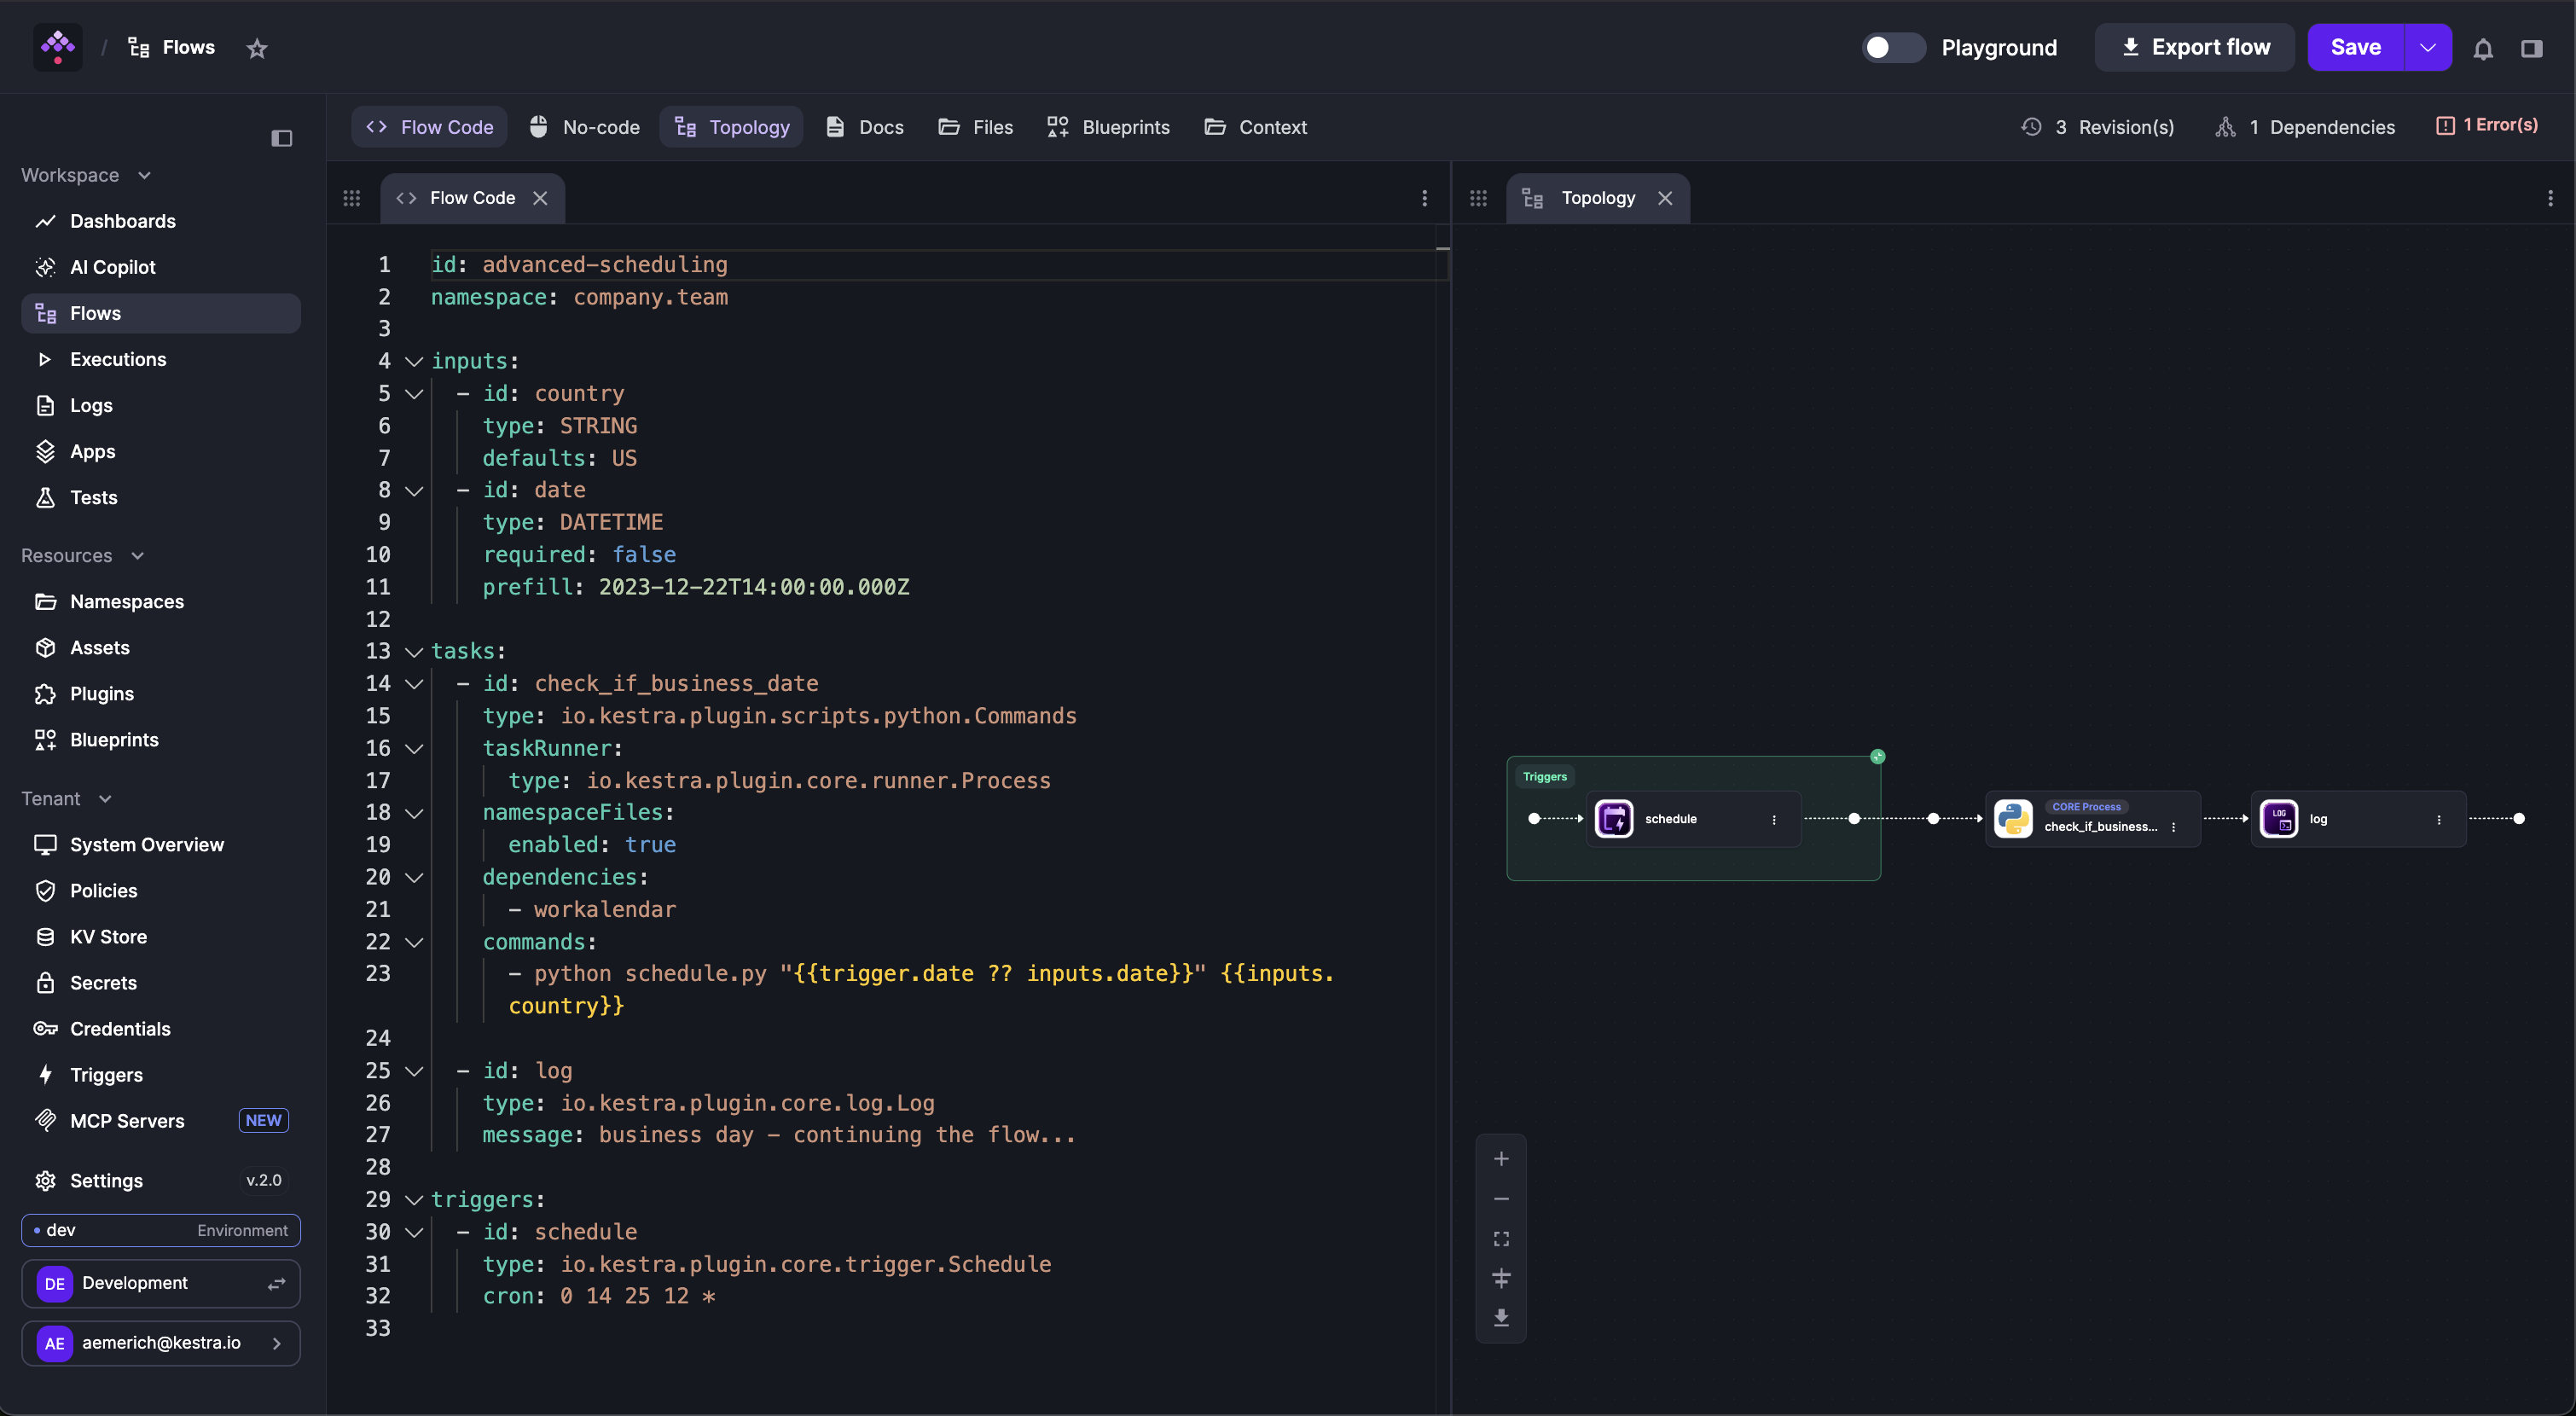
The Topology view shows a visual DAG of the flow — useful for complex flows with multiple branches. Zoom controls and a .png export are in the bottom-left corner.
Documentation view
The Documentation view displays plugin docs directly inside the editor. The panel updates as you move your cursor to reflect the task type at the current position.
If you use the Brave browser, you may need to disable Brave Shields to make the editor work as expected. To view task documentation, set the Block cookies option to Disabled in Shields settings at brave://settings/shields.
Files view
The Files view lets you create, edit, and delete Namespace Files. Open multiple files side by side using the multi-panel layout.
Blueprints view
The Blueprints view gives you example flows to copy directly into the editor — useful when working with a new plugin.
Context panel (Enterprise)
The Context panel gives you direct access to namespace Variables, KV pairs, and Secrets from within the editor. You can also render expressions against those values inline.
Revisions
You can view the history of your flow code changes under the Revisions tab. For more details, see Revisions.
Dependencies
The Dependencies tab shows the relationship between this flow and other flows, and lets you navigate between them. The Dependencies View on the Namespaces page shows all flows in the namespace and how they relate to one another — the flow-level Dependencies view is scoped to the selected flow only.
Was this page helpful?